This Mama's Life

  • Home
  • About Me
    • Disclosure
    • Privacy Policy
  • Disney
    • Disney
    • Disney
    • Disney On Ice
    • Disney Printables
  • DIY
  • Holidays
    • Christmas
    • St Patrick’s Day
    • Easter
    • Mother’s Day
    • 4th Of July
    • Halloween
    • Gift Guides
  • Recipes
    • Appetizers
    • Cocktails
    • Entrees
    • Desserts
    • Drinks
    • Soy Sunday
  • Printables
  • Reviews
    • Adult
    • Baby
    • Clothing
    • Electronics
    • Fashion
    • Footwear
    • Kids
    • Movies
      • Kids
  • Travel
    • Chicago
    • Cruise
    • Hotels
      • Hotel
    • Michigan Events
      • Michigan

Pressure Cooker Tie Dye Eggs

April 19, 2019 Amy 3 Comments

Disclosure: Purchases made through links provide us with a small commission. As an Amazon Associate I earn from qualifying purchases. Please refer to our disclosure policy for more information.

Share
Pin
Tweet
0 Shares
When it comes to dying Easter eggs, many of us procrastinate until the last minute and then go with the easiest method possible because we’re out of time. Which usually results in boring eggs that look the same as last year’s eggs – because you ran out of time last year too! What if I told you that you could make Pressure Cooker Tie Dye eggs in just as much time as it takes to lay down the newspaper on your table and start making that messy vinegar, chalky tablet, and water mixture?
Believe me; once you dye your eggs this way, you’ll never look back! It’s fun, easy, much cleaner, and these eggs will look great in your Easter basket!
The best part is that pressure cooker tie dye Easter eggs save a ton of time because you cook and decorate the eggs at the same time! You truly can do it all in the last minute. It doesn’t get any better than that!
Because you’re using a pressure cooker, you’ll want to keep kids away from the cooking portion of the project, but they can definitely help pick out the ties, wrap the eggs, and put them into the cold pressure cooker pot!

Supplies:

6 large eggs 

½ cup of vinegar 

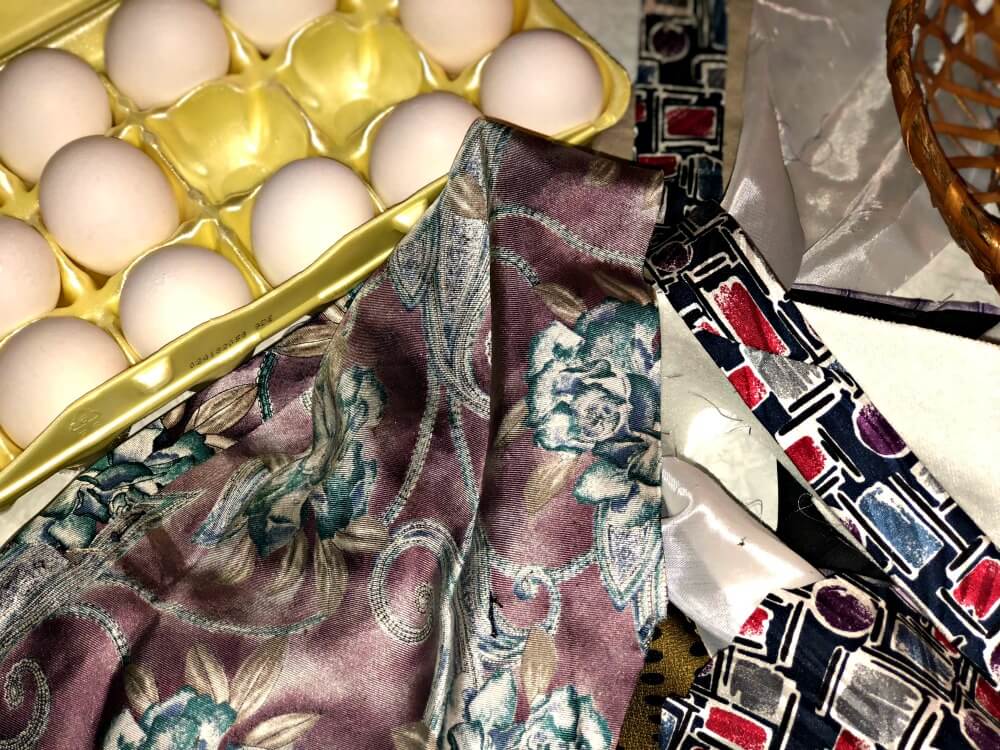
Ugly old Silk ties, the busier and more colorful the pattern, the better your eggs will look. 

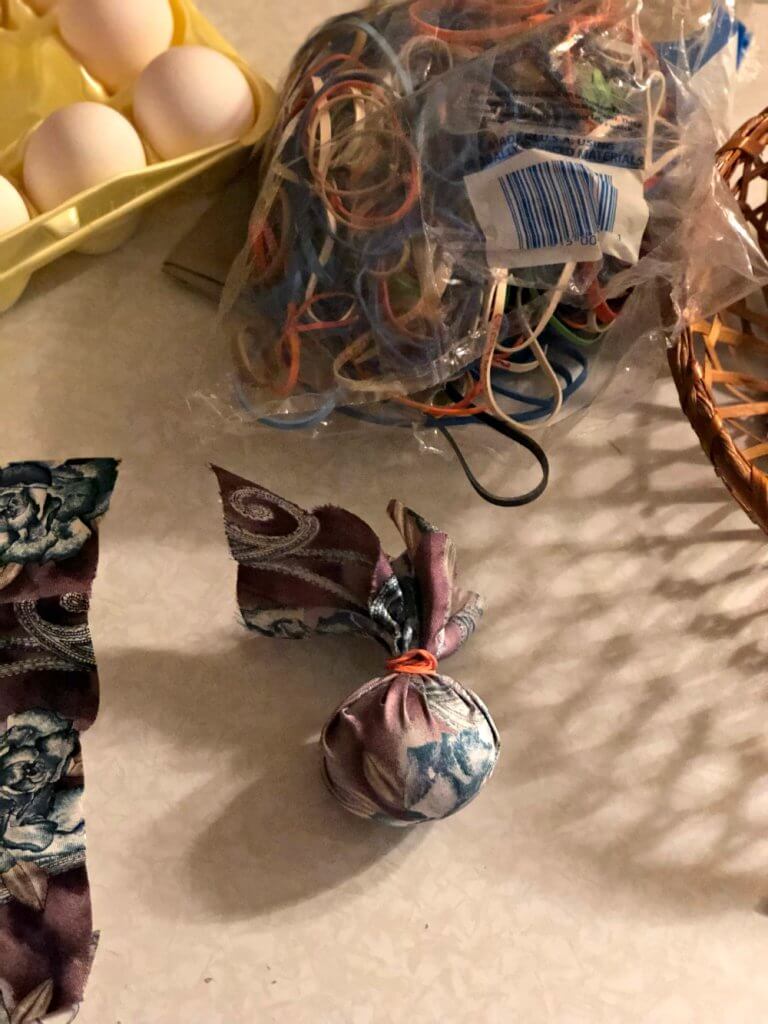
Old thin white or light grey tshirt, that you don’t mind destroying 

Rubber bands or twist ties 

Instructions for Pressure Cooker Tie Dye Eggs:

Put all pre wrapped eggs right in your instant pot. 

Cover eggs with water 

Add ½ cup of vinegar 

Place on and lock lid 

Use Manual high pressure for 5 minutes 

When you hear the beep, let your pot natural release for 5 minutes 

Once all pressure has released, QR the remaining pressure  

While waiting on remaining pressure make an ice bath  

Remove lid once all pressure has been released, and immediately submerge in an ice bath for 5 minutes 

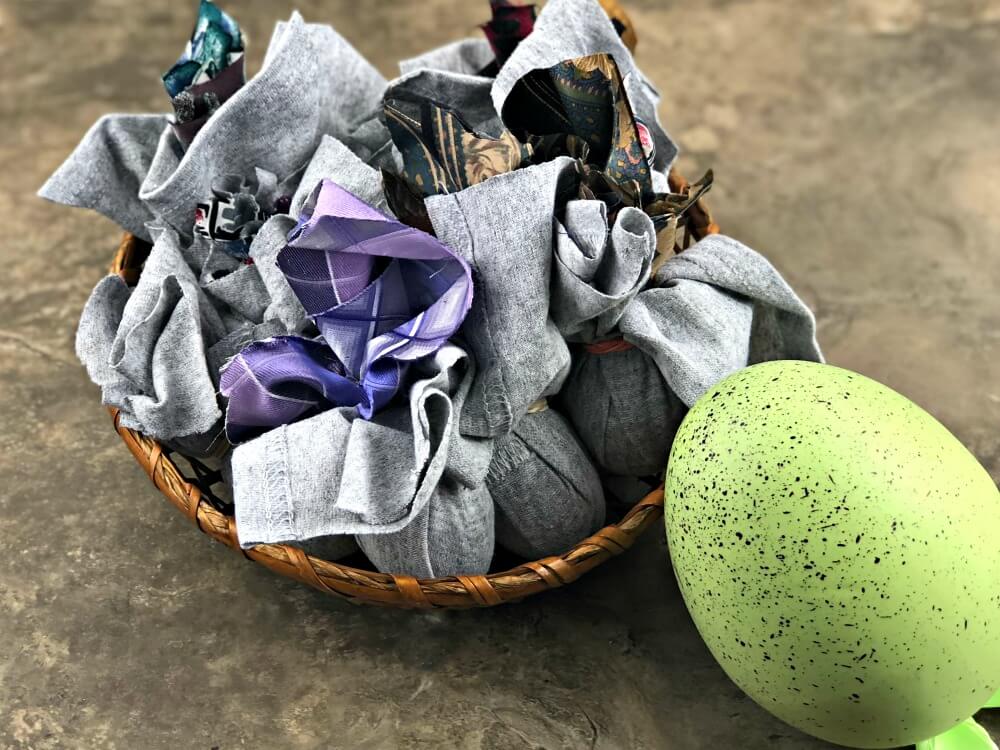
Carefully unwrap the eggs 


As you can see, we used a variety of patterns for our Instant Pot Tie Dye eggs.

Carefully cut the stitching out of your ties and cut into pieces large enough to completely cover the egg 

Wrap your eggs with the full color patterned side of the tie or the front of your tie touching the egg. 

Wrap tight but be gentle, you don’t want to break the eggs!

Secure with rubber band or twist tie 

Place the old cloth over the tie to protect the colors from bleeding onto your eggs 

Secure with rubber band or twist tie 

Follow the recipe instructions to complete the project 

It may look like there are a lot of steps involved, but pressure cooker tie dye eggs are truly the easiest and most mess-free Easter eggs we’ve ever decorated! I highly recommend you give it a try this year. I bet you’ll never go back to the “old” way again!

Easter

About Amy

Workaholic turned SAHM to 3 amazing kids. Amy is a Social media lover turned blogger who writes about all things related to life: cooking, parenting, family events, drinks (Hey, we all need one once in a while!) and Local Michigan happenings.

Comments

  1. Richard Brandt says

    April 30, 2019 at 12:33 am

    Oh, Pressure Cooker! Is there anything you can’t do?

    Reply
  2. Dana Rodriguez says

    May 23, 2019 at 6:38 pm

    These are really pretty! Thanks for the great idea!

    Reply
  3. Kaitlyn Fuerth says

    May 30, 2019 at 8:53 pm

    These look amazing! Gives me an 80s vibe.

    Reply

Leave a Reply Cancel reply

Your email address will not be published. Required fields are marked *

This site uses Akismet to reduce spam. Learn how your comment data is processed.

Meet Amy Workaholic turned SAHM to 3 amazing kids. Amy is a Social media lover turned blogger who writes about all things related to life: cooking, parenting, family events, drinks (Hey, we all need one once in a while!) and Local Michigan happenings.

Contact me at thismamaslifeblog (at) gmail.com
  • Facebook
  • Instagram
  • Pinterest
  • RSS
  • Twitter

Amazon Associate Disclosure

We are a participant in the Amazon Services LLC Associates Program, an affiliate advertising program designed to provide a means for us to earn fees by linking to Amazon.com and affiliated sites

Shop Here

Recent Posts

  • How to make gardening easier for yourself
  • Filter Your Water The Easy Way
  • Perfectly Cooked Meat With This Smallest Thermometer
  • Disney Genie: Everything You Need to Know About Disney’s New App
  • Positive Affirmations on Your Socks

Places I Belong

Categories

· © Copyright 2016 This Mama's Life · All Rights Reserved · Site Design Carol Jones Media